You will need:
- screwdriver
- scissors
- cable ties
1. Start with opening all the packages. Keep screws in good order and case manual + motherboard manual near.
2. Open your computer case and insert motherboard inside. Notice that you may have to screw bolts under the motherboard. Check that from your manuals. Don't be afraid the components won't broke easily. I even used magnetized screwdriver which you should never use! Anyway it is good to grab the motherboard from sides and ports.


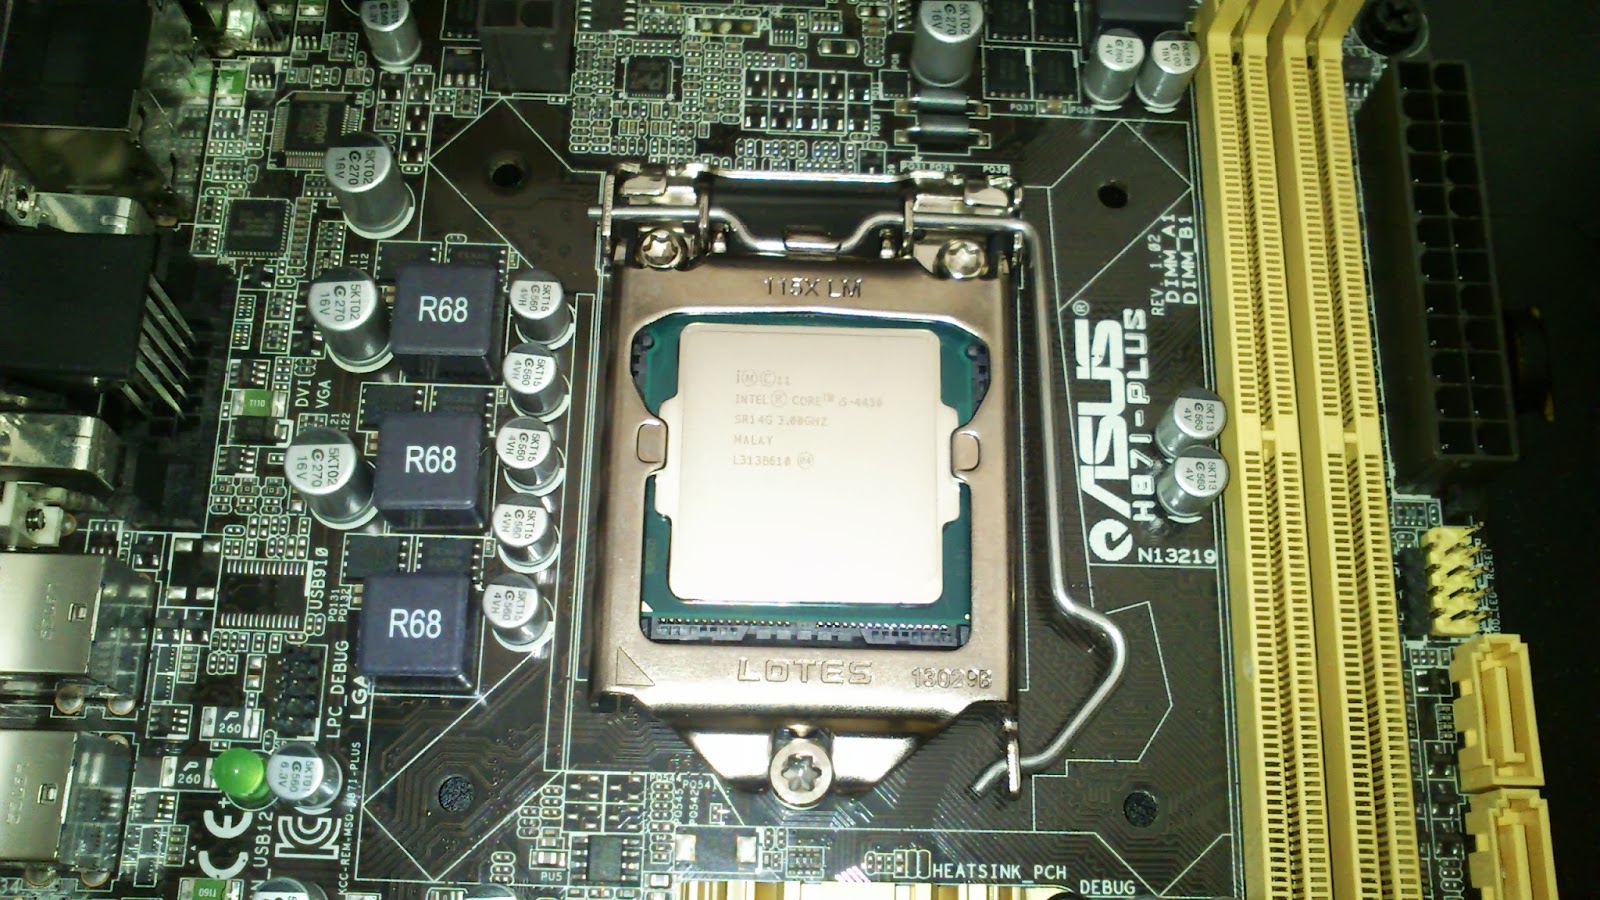
3. Step three installing processor. This may feel scary, but its not. In this case we have new Core I5 processor. Open the processor socket by pushing down the metal lever and then pull it to right, it will open.

4. Now it is open.

6. When you have placed the processor its time to lock it back and insert some silicon. This motherboard had very tight lock and I thought it will break but it has to be closed so just close it.

7. Insert silicone a little bit and spread it with finger or something.
8. After silicone

9. Use silicone which is for computers. Nothing else is suitable.

10.Next insert CPU cooler. Intel processors are very easy to insert. Just press it and it will make a sound "SNAP" when it's attached. If you turn the black things which has arrows the cooler will pop out. This was a mistake I did. Dont turn those, just press the cooler on.

11. Look port which says CPU FAN or look from the motherboard manual where that is located. Insert your cpu cooler cable to that port. It should fit only in one way.

12. Next we are going to insert RAM memory. RAM is installed into those two yellow bars. In modern computers ram memory works in dual channel so the ram slots are usually color coded. Install Your ram into ports which have the same color. For example you have 2 red and 2 yellow ports you should install 2 sticks into red or yellow. Not one in the yellow and one in the red. Same goes for ram port numbers if you have 4 slots which have the same color they are normally numbered.
13. Tilt the ram lock a bit backwards and it opens.

14. RAM stick will only fit in one position so you cant install it wrong.

15. Push hard (not too hard) and it will "click" when it's installed.

16. Installing display card. Modern display card need two holes from the back or if it's not high end display card it may take only one slot. Open this kind of slots from the back of your computer.

17. Push your display card into slot which says PCI-E 16x or something similar. Not only PCI...


18. Then look for hard drive bay. Usually modern cases have sleds for hard drives. Squeeze from the black things and pull the sled out.

19. Install your hard drive on to sled. and push it back to the case.


20. Install CD/DVD drive. Depending on your case either open the front panel and push the drive in or from back.

21. You should have two SATA cables which look like this:

22. Attach one in the back of your hard drive and the other end into sata1 port in the motherboard. Do the same thing for CD drive but insert it into sata2 drive.


23. Now it will get a little narrow in this case so you can tie the cables in to the case with cable ties if possible.
24. Install your power supply in the back of the case. Best way how to do this is look from your manual how it is installed but it should not be too hard. This case had four screws.

25. Then you have to look from the motherboard manual how to insert small cables from your case to the motherboard. Includes powerbutton, usb ports, sound ports etc. Things that also need power are your hard drive, CD drive, some display cards require power and usually the motherboard itself has two ports that need power.
26. Insert power cable, display, mouse and keyboard. Don't close the case in case it doesn't work yet. Power on the computer and check if all the fans are rotating.

27. If you see your computers post screen or at least something in the screen it's a good sign and you should be ready to install operating system.

28. Example of a new modern bios screen. If you see this or something similar with usually blue background you can pat yourself on the shoulder.

29. Install operating system.
Fault conditions
Computer doesn't start.
- Check that motherboard light turns on when you put power cable in to the machine
- Check that your case powerswitch cable is connected to the right pin in motherboard
- Check that all power cables are connected to motherboard
If your monitor doesn't wake up or you don't see anything on the screen:
- Check that RAM memory is locked correctly
- Check that display card is connected correctly
- Check that your motherboard bios is correct for the CPU (motherboard bios should be in the manual and processors minimum bios version can be found from the internet)
Any other booting problems
- Start with minimum parts and try to boot. For example install just motherboard, power supply and processor. Then add display card, memory, hdd in order and see which part is not working.
Ei kommentteja:
Lähetä kommentti